01
Warm, cool, neutral
Warm undertones run golden, peach and olive. Cool undertones run pink, red and blue. Neutral sits between the two and takes either. Every one of the three occurs at every depth, which is why depth alone tells you nothing.

Beauty School
A course in eight chapters: how colour works on skin, the order a face goes on in, how to place a base, what finish and coverage actually mean, what the tools are for, what a cosmetic is made of, where to place it for your own face, and how one look becomes another after dark.
Start the courseChapter one
Almost every foundation that looks wrong is the right depth and the wrong undertone. Depth is how light or deep a shade is. Undertone is the colour underneath it, and it does not change when you tan.

01
Warm undertones run golden, peach and olive. Cool undertones run pink, red and blue. Neutral sits between the two and takes either. Every one of the three occurs at every depth, which is why depth alone tells you nothing.
02
Look at the skin on the inside of your wrist in daylight, not under a bulb. Compare a gold ring and a silver one against it and see which disappears. Then check which of a stark white shirt and a cream one flatters you. Two of the three agreeing is your answer.

03
Opposite colours cancel. That is the whole of colour correcting: peach and orange sit opposite blue, so they neutralise a blue cast, and green sits opposite red. It is also why a lip that fights your undertone reads louder than you meant it to.

04
Deeper skin carries the widest undertone range of all, which is exactly why matching by depth alone fails hardest there, and why depth-only shade ladders run out. Start from undertone and work to depth, not the other way round. Foundation.

05
Not the wrist and not the back of the hand, which are rarely the colour of your face. Draw a stripe along the jaw, let it sit for ten minutes, then look in daylight. The right shade stops looking like makeup.

06
This chapter is the theory. The matching itself lives in the Shade and Finish Guide, which walks undertone, finish and coverage and returns real shades from the range.

Chapter two
Order is not fussiness. Each step changes the surface the next one has to sit on, so working out of sequence is most of what makes a face look heavy.
1
Primer is a surface, not a product you should be able to see. It gives everything above it something even to hold on to. Primer.


2
Foundation, tinted moisturiser or BB cream, whichever coverage the day asks for. Thin first, then build. Foundation.


3
After base, never before. Once the base is down you can see what actually still needs concealing, which is usually far less. Concealer.


4
5
Brows frame everything above and set how strong the rest can be. Shape to the face you have rather than to a trend. Brow.


6
Blush and bronzer put the blood and the light back, which is what a base takes away. Blush and Bronzer.


7
8
Set only where you need to hold, which on most faces is the centre panel. Setting everything is what turns a skin finish flat. Finishing Powder.


Built as a sequence you can shop: the 7 Step Makeup Routine, or the full Complete Makeup Routine.
Chapter three
The difference between foundation that sits on a face and foundation that becomes it is almost entirely in how it is put down.
1
Start on skin that is clean and already moisturised, and give it a minute to settle. Match along the jaw in daylight, never on the back of the hand.

2
Put small amounts where you want the most coverage, then press outward. Spreading a single blob thins it everywhere and covers nothing.

3
A second thin pass on the centre of the face beats one thick pass everywhere. Edges stay sheer, which is what keeps a jawline invisible.

4
Set where you shine and leave the rest. Powdering a whole face is the fastest way to lose the finish you chose the foundation for.

Ready to put it into practice? Shop foundation, browse powder foundation, or see the full cosmetics collections.
Chapter four
Two words do most of the work when you choose a base. Finish is how light behaves on the surface. Coverage is how much of the skin below still shows.

Finish


Coverage


Know the words and want the shade? The Shade and Finish Guide walks undertone, finish and coverage and returns real shades from the range.
Chapter five
A tool does not apply a product, it decides how much of it lands and how hard the edge is. Changing the brush changes the result more than changing the shade.

01
Damp, it dilutes and presses. Use it to sheer a base out and to knock back anything that went on too heavy. Dry, it does the opposite and takes coverage up.


02
A dense head deposits colour and gives you a hard edge. A loose, longer head blends and gives you a soft one. Most mistakes are a dense brush used for a job that needed a loose one.


03
Short, flat and firm. It presses pigment onto the lid rather than sweeping it, which is how you get colour that reads as strongly as it did in the pan. Brushes.


04
Press and roll, do not drag. A puff sets into the base rather than sitting on it, which is why it holds longer than a brushed layer.

05
An angled head follows a line you already have: the brow, the lash root, the lip edge. It is a tool for accuracy, not coverage. Brushes and tools.


06
Wash with the head pointing down so water never runs into the ferrule, reshape while damp, and dry flat. Water sitting in the ferrule is what loosens the glue and sheds bristles. Beauty accessories.


Chapter six
Nine jobs, and every ingredient in the range is doing one of them. Each name below opens our own entry for it, with what it is, where it sits in the formula, and how many products in the range it appears in.
Every shade in the range starts here. The iron oxides and titanium dioxide do the work on skin, and the certified lakes carry the brighter reds, oranges and blues that a lip needs and an earth pigment cannot reach.

Finish is not a pigment. These are effect materials, in the formula to change how light leaves the surface. They are the difference between a powder that goes flat and one that gives back a glow.

The structuring waxes. They are why a lipstick can live in a pocket and still draw a clean line, and why a gloss has weight instead of running.

The powders that decide how something feels going on: slip across the skin, cling once it lands, and whether a pressed pan gives its colour up evenly to a brush.

Emollients. Pigment on its own is a dry powder. These are what let it move, blend and stop at an edge you chose rather than one it chose.

The silicone system. An even film that holds pigment in place through a day, and the emulsifiers that keep that film and the water phase from parting company in the bottle.

Left alone, a liquid formula settles into a clear layer and a heavy one. These hold the pigment in suspension so the last use is the same colour as the first.

Water, the humectants that hold moisture in the formula, and the conditioning agents that sit alongside the colour rather than doing the colouring.

The preservation system and the stabilisers. The least glamorous chapter in any formula, and the reason a product opened in January is still fine to use in June.

All 88 entries live in the ingredient glossary.
Chapter seven
Light brings forward, shadow sends back. That single rule is the whole of contouring, and everything below is an application of it. None of this is correction in the sense of fixing something. It is placement.

By face shape


By lip shape


Chapter eight
An evening look is not a different routine. It is the day routine with three decisions changed, and knowing which three is what stops it becoming a costume.
01
Eye or lip, not both. Two focal points compete and the face reads busy rather than dramatic. Everything that is not the focus gets quieter, not louder.

02
Evening wants more depth in the crease and a firmer edge, not another layer of base. A heavier base under low light looks like a mask, not like glamour.

03
Warm indoor light eats the top of a shade, so what reads bold in daylight reads muted after dark. Go one step deeper than feels right in the mirror at home.

04
On the top of the cheekbone, the brow bone and the centre of the lip. Shimmer anywhere there is texture rather than bone will find that texture and show it.

05
A longer night needs the centre panel held and the outside left alone. Setting the whole face for longevity trades the finish you built for it.

06
Built out as a set rather than a list of steps: Full Glam Look.

Put it to work
Three ways to turn the course into something you can actually wear.
Walks undertone, finish and coverage and returns real shades from the range. The practical half of chapter one.
Every material in chapter five, in full: what it is, what it does, and how many products in the range it appears in.
Every cosmetics collection in one place, from base and brow through to brushes and tools.
One more thing
You do not have to hold all of this at once. Answer a few questions and we will match the shade, the finish and the coverage to you.
Open the Shade and Finish Guide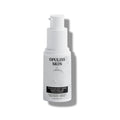 CELLULAR ANTI-AGING BIORETINOL EYE SERUM
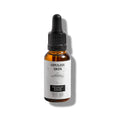 CAFFEINE DE-PUFF EYE BOOSTER
 CELLULAR ANTI-AGING GINKGO BOOSTER
 ROSE WATER HYDRATING SERUM
 ALPHA-ARBUTIN BRIGHTENING SERUM
 United States
|
USD
$
United States
|
USD
$
You are currently shipping to United States and your order will be billed in USD $.
 Afghanistan
USD
$
Afghanistan
USD
$
 Armenia
USD
$
Armenia
USD
$
 Azerbaijan
USD
$
Azerbaijan
USD
$
 Bahrain
USD
$
Bahrain
USD
$
 Bangladesh
USD
$
Bangladesh
USD
$
 Bhutan
USD
$
Bhutan
USD
$
 Brunei
USD
$
Brunei
USD
$
 Cambodia
USD
$
Cambodia
USD
$
 Canada
USD
$
Canada
USD
$
 Central African Republic
USD
$
Central African Republic
USD
$
 China
USD
$
China
USD
$
 France
USD
$
France
USD
$
 Georgia
USD
$
Georgia
USD
$
 India
USD
$
India
USD
$
 Indonesia
USD
$
Indonesia
USD
$
 Iraq
USD
$
Iraq
USD
$
 Israel
USD
$
Israel
USD
$
 Japan
USD
$
Japan
USD
$
 Jordan
USD
$
Jordan
USD
$
 Kazakhstan
USD
$
Kazakhstan
USD
$
 Kuwait
USD
$
Kuwait
USD
$
 Kyrgyzstan
USD
$
Kyrgyzstan
USD
$
 Laos
USD
$
Laos
USD
$
 Lebanon
USD
$
Lebanon
USD
$
 Malaysia
USD
$
Malaysia
USD
$
 Maldives
USD
$
Maldives
USD
$
 Mongolia
USD
$
Mongolia
USD
$
 Myanmar (Burma)
USD
$
Myanmar (Burma)
USD
$
 Nepal
USD
$
Nepal
USD
$
 Oman
USD
$
Oman
USD
$
 Pakistan
USD
$
Pakistan
USD
$
 Philippines
USD
$
Philippines
USD
$
 Singapore
USD
$
Singapore
USD
$
 South Africa
USD
$
South Africa
USD
$
 South Georgia & South Sandwich Islands
USD
$
South Georgia & South Sandwich Islands
USD
$
 United Arab Emirates
USD
$
United Arab Emirates
USD
$
 United Kingdom
USD
$
United Kingdom
USD
$
 Vietnam
USD
$
Vietnam
USD
$